Using the Bootic API in a Ruby on Rails application
This article shows how to access Bootic API data from a Ruby on Rails Application. The reader is expected to have a working knowledge of the Rails framework.
At the end of this article you will be able to use Bootic’s login system to log Bootic users into your application, and access Bootic’s API on their behalf to display a list of recent orders.
Setup
Create an OAuth2 application
We’ll use Bootic’s OAuth2 provider service to implement Single Sign-on (SSO) for you app’s users. This means that users will be able to login to this app using their Bootic user credentials.
This process involves the app redirecting to Bootic’s OAuth provider with an OAuth2 application credentials, the user authorizing the application to access their Bootic data on their behalf, and Bootic’s OAuth2 provider issuing an API access token back to the Rails app.
As a developer, you must first create an OAuth2 application and obtain its client_id and client_secret credentials. You only need to do this once.
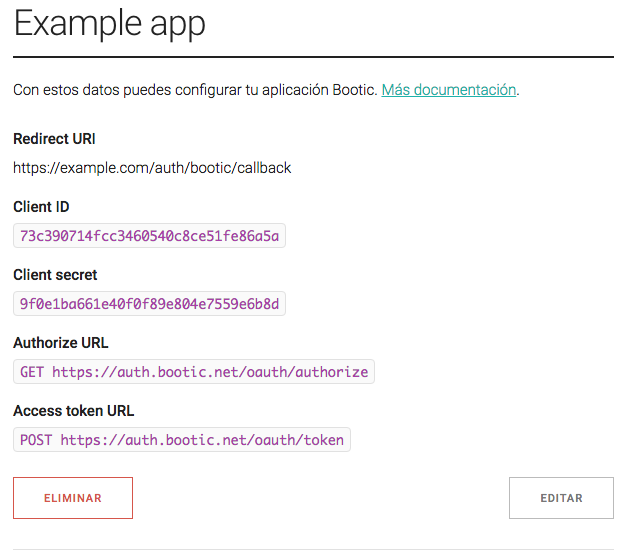
Make sure that the OAuth2 Application’s “Redirect URI” matches you app’s host plus the path /auth/bootic/callback (more on that shortly). For example, if your local development app runs on http://localhost:3000, you’ll enter http://localhost:3000/auth/bootic/callback.
Install Omniauth-Bootic
Omniauth is a Ruby framework for plugin different authentication strategies into Rails apps, allowing your users to signup into your app using 3rd party identity providers such as Twitter, Facebook, Google or, in this case, Bootic.
Omniauth-Botic is an Omniauth strategy that will do most of the work to let you seamlessly add Bootic Single Sign-on to your Ruby apps.
First, add Omniauth-Bootic to you app’s Gemfile.
gem 'omniauth-bootic'Now install it.
bundle install
Now we’ll create a file in config/initializers/omniauth.rb to configure it with your OAuth2 credentials.
# config/initializers/omniauth.rb
Rails.application.config.middleware.use OmniAuth::Builder do
  provider :bootic, ENV['BOOTIC_CLIENT_ID'], ENV['BOOTIC_CLIENT_SECRET'], scope: 'admin'
endUser login
We will now implement the user login flow.
Add a “login” link.
In one of your public views, add …
<a href="/auth/bootic" class="btn-login">Login with Bootic!<a>Omniauth adds these special auth/:provider logins routes automatically from your configuration above.
When the user clicks this link, they will be redirected to auth.bootic.net where they will be asked to login using their own Bootic credentials and, the first time, authorize your application to access their Bootic data on their behalf.
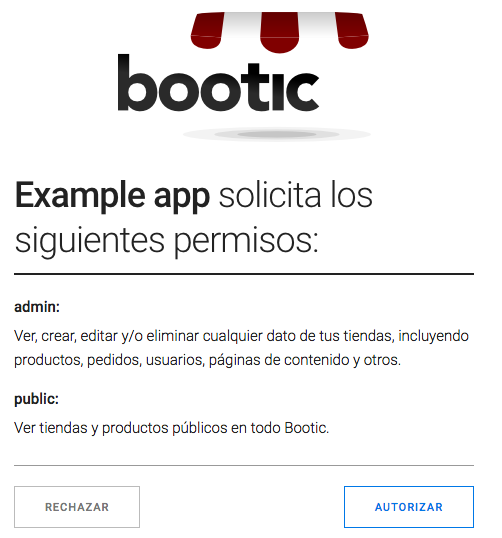
After the user authorizes your application, auth.bootic.net redirects to you app’s redirect_uri, where Omniauth-Bootic finished the process.
Add required routes.
Omniauth expects your app to define a few routes. These routes encompass the complete user flow of logging in, registering and logging out of your app.
You can point these routes to whatever controller and action you want, but we’ll use a SessionsController to encapsulate everything to do with user sessions and login.
# This route is hit by Omniauth when it's done with the
# user authorization flow, and will receive user data
# that you can use to complete the registration in your system
match '/auth/:provider/callback', to: 'sessions#create', via: [:get, :post]

# Use this to logout or destroy the user session
get '/auth/logout', to: 'sessions#destroy', as: :logout

# This is a normal Rails action that will be login-protected
get 'dashboard', to: 'dashboard#index'
Create controller actions
We’ll create SessionsController in app/controllers/sessions_controller.rb
class SessionsController < ApplicationController

  # This action is invoked at the end of the authorize/login flow
  # Omniauth puts the user data sent by Bootic in the 'omniauth.auth' request variable.
  def create
    # We'll need the Bootic access token later
    # so let's store it in the session
    # (you could store it in your database, too)
    session[:access_token] = request.env['omniauth.auth']['credentials']['token']

    # Omniauth-Bootic returns some aditional user information.
    # Lets store it too
    session[:user_name] = request.env['omniauth.auth']['info']['name']

    # That's it! The user is now logged in our Rails app.
    # Redirect to some protected page
    flash[:notice] = "Welcome!"
    redirect_to dashboard_url
  end

  # Destroy the session and logout.
  def destroy
    session.delete :access_token
    session.delete :user_name
    redirect_to root_url
  end
end
Note that we’re only storing user data in the Rails session (cookie-based by default), but if you have your own database of users you could make sure to create a local user if one doesn’t exist already.
def create
  bootic_email = request.env['omniauth.auth']['info']['email']
  bootic_name = request.env['omniauth.auth']['info']['name']
  user = User.where(email: bootic_email, name: bootic_name).first_or_create
  session[:user_id] = user.id
  # .. etc
end
Finally, we’ll add the newly logged in user’s name in app/views/dashboard/index.html.erb to welcome them into the application.
<h1>Welcome, <%= session[:user_name] %></h1>Bootic API client
What we’ve seen so far is enough if you just want to use Bootic’s OAuth2 provider as a Single Sign-on mechanism, but if you want to use the provided access token to access the Bootic API in a Ruby app, we recommend you use our official BooticClient gem.
Add it to your Gemfile.
gem 'bootic_client'And install it
bundle install
Configuring the client
… Now we’ll configure it with your OAuth2 application credentials, just like you did with Omniauth-Bootic.
# config/initializers/bootic_client.rb
BooticClient.configure do |c|
  c.client_id = ENV['BOOTIC_CLIENT_ID']
  c.client_secret = ENV['BOOTIC_CLIENT_SECRET']
  c.logger = Rails.logger
  c.logging = Rails.env.development?
  c.cache_store = Rails.cache
end
Client instance.
Now we need to instantiate the Bootic API client in our controllers so we can use it everywhere in our app. We need to pass it the access_token we just got from Omniauth.
# app/controllers/application_controller.rb
def bootic_client
  @bootic_client ||= BooticClient.client(:authorized, access_token: session[:access_token]) do |new_token|
    Rails.logger.info "Renewed access token"
    session[:access_token] = new_token
  end
endList orders
We’ll now use the bootic_client instance available in every controller to fetch a list of recent orders for your Bootic shop.
Root resource
Bootic’s API is designed after Hypermedia principles, meaning that its JSON responses include links to other resources in the system. This is similar to how you normally navigate the Web by following links from one page to the other. The Bootic Ruby Client fully supports this.
The first step to do anything else with the API is to load the Root Resource, the API’s entry point. This resource includes links to most things you can do with the API.
in app/controllers/dashboard_controller.rb:
def index
  # The API root resource
  root = bootic_client.root
  # Your main shop
  shop = root.shops.first
  # Do you have permissions to access the shop's orders?
  @orders = if shop.has?(:orders)
    shop.orders(sort: 'updated_at.desc')
  else
    []
  end
end
Note that we check that the shop sub-resource has a link called “orders”. If the link isn’t there, it means that your access_token doesn’t have the right scope of “admin”.
Cleaning up
You can simplify this controller action a bit by creating a helper method to access common API resources like root and its embedded shop.
# app/controllers/application_controller.rb
protected

def bootic_root
  @bootic_root ||= bootic_client.root
end

def current_shop
  @current_shop ||= bootic_root.shops.first
end
So now your DashboardController and any other controllers look much simpler.
# app/controllers/dashboard_controller.rb
def index
  @orders = if current_shop.has?(:orders)
    current_shop.orders(sort: 'updated_on.desc')
  else
    []
  end
end
The view
We’re almost there! Now we just need to list the @orders in the app/views/dashboard/index.html.erb view.
<h2>Your recent orders</h2>

<ul class="orders_list">
  <% @orders.each do |order| %>
    <li class="order status_<%= order.status %>">
      <h3><%= order.code %></h3>
      <span class="total"><%= number_to_currrency order.net_total %></span>
      <span class="units"><%= order.units %> units</span>
      <span class="products">products: <%= order.line_items.map(&:product_title).join(', ') %></span>
    <li>
  <% end %>
</ul>Optimizing
This wasn’t too hard, and it works; but talking to external API’s will always be slower and less reliable than connecting to a local database.
Fortunately, the Bootic API can help you optimize client-server communication by adding HTTP caching headers to its responses. In turn, the Bootic Ruby client knows how to parse these headers and store repeat responses in a local cache. This means that subsequent requests to a cached resource will be much faster.
In our configuration above we already ask the Bootic client to use the Rails.cache interface to store responses.
# config/initializers/bootic_client.rb
BooticClient.configure do |c|
  # ...
  c.cache_store = Rails.cache
end
In development mode Rails uses an in-memory cache store, but in production it is recommended that you use a distributed store such as Memcache
So the good news is that you just have to configure Rails.cache to use Memcache to get a noticeable speed boost when using the Bootic API client in a Rails app.
Read more on Rails caching here.
And that’s the basics of working with the Bootic API in a Rails application. If you have any questions or problems please contact us on our contact form.
Deployment
You should be able to deploy this app like any other Rails application, including hosted services like Heroku.
Keep in mind that you need to create a separate OAuth2 application with a redirect URI matching your live server.
For example, if your production app is deployed to https://my.greatapp.com, for Omniauth to work with Bootic’s OAuth2 server you need to enter a redirect URI of https://my.greatapp.com/auth/bootic/callback.
Remember to configure your BOOTIC_CLIENT_ID and BOOTIC_CLIENT_SECRET accordingly to use the live app credentials in the “production” environment.
